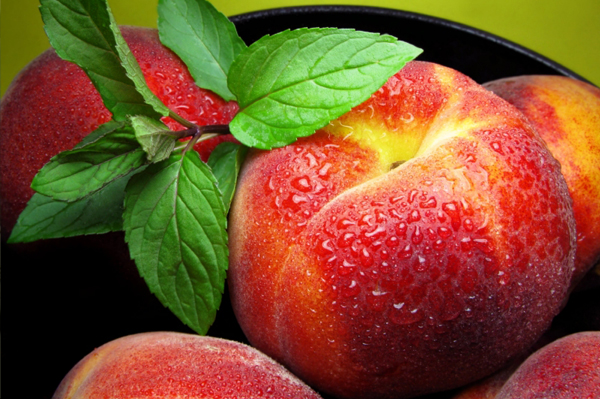
Sunday, 10 January 2016

Chocolate Gift Wrapping Ideas 

Hi Chocolate Lovers ! 

Wishing you all a Happy New Year, hope this year in 2016 you put "eat chocolates" at the top of your list of things to do. That way, at least you'll get one thing  done.  -- Author Unknown

Now have we got a treat for you...

Check out our video on different ways to warp and gift chocolates. These are great ideas for friends or family whether it be for a party or for that special someone, there are endless ways to wrap chocolates. 

It is a cute and fun idea and we are sure you will enjoy making it as well as giving. 


By Hovig,Mary,Steph

Tuesday, 1 December 2015

Christmas Cheers

It’s December and for everyone all ages this will probably be the most exciting time of the year, Christmas is around the corner. The dessert chosen for this month will be the most obvious and fun… ginger bread houses and men. Enjoy the recipe below and cook up a feasting dessert for your family and friends on this joyous occasion.


You will need: Base - Plywood, heavy platter or chopping board; Cardboard cut-outs - Two 13cm x 19cm rectangles (roof), Two 11.5cm x 16cm rectangles (side walls), Two 16cm x 19cm rectangles (front and back), each trimmed at 1 short end to form two 10cm-high gables; Decorations - Rafaela balls, white choc melts, white choc bits, Allens ABC jubes, red M&Ms or Smarties, red and white licorice bullets, red jelly beans, strawberry creams.
Ingredients

 3 1/2 cups self-rising flour
 1 cup plain flour
 1 tablespoon ground ginger
 2 teaspoons ground cinnamon
 1 cup firmly packed brown sugar
 185g butter, chopped
 1/2 cup golden syrup
 2 eggs, lightly beaten
 1/4 cup pure icing sugar
Royal icing
 2 egg whites, lightly beaten
 3 cups pure icing sugar

Step 1
Combine flours, ginger, cinnamon, sugar and butter in a food processor. Process until mixture resembles breadcrumbs. Whisk golden syrup and eggs together in a jug. With the motor running, add egg mixture and process until dough just comes together. Turn onto a lightly floured surface. Knead gently until smooth. Cut dough in half and wrap in plastic wrap. Refrigerate for at least 4 hours or until well chilled.
Step 2
Roll dough, 1 portion at a time, between 2 sheets baking paper until 5mm thick. Remove top layer baking paper. Using cardboard cut-outs as a guide, cut shapes from dough (see tip). Place gingerbread in a single layer on trays. Freeze for 15 minutes or until firm.


Step 3
Preheat oven to 180°C. Line 4 baking trays with baking paper. Place gingerbread on trays. Bake, 2 trays at a time, for 15 minutes or until firm. Cool on trays.
Step 4
Make royal icing: Using an electric mixer, beat egg whites until soft peaks form. Gradually add icing sugar, beating constantly until thick.
Step 5
Use icing to join walls together, placing unopened cans of food to support walls until icing dries. Use icing to attach roof to walls, using cans to support roof (to prevent it from slipping off walls) until icing dries completely.
Step 6
Spoon 1/2 cup remaining icing into a snap-lock bag. Trim 1 corner of bag and pipe windows and doors on house and frost on roof edges. Allow to dry. Spoon remaining icing into snap-lock bag. Pipe a little icing on the back of each lolly and attach to house to decorate. Dust roof with icing sugar.

By Mary Luluga 

Friday, 6 November 2015

Chocolate-Peanut Butter Tart


Welcome Peanut Butter Lovers!


This holiday (in the month of November) is not just about the love of peanut butter but it's all about the people who love peanut butter too!  If your an American you most likely love peanut butter because you most likely grew up eating peanut butter and jelly sandwiches as a kid. So for this holiday find as many recipes as you can that uses peanut butter and enjoy each and every peanut butter bite.  After all, this month is for all of us who love peanut butter.

So to celebrate this special month why not try making a Chocolate-Peanut Butter Tart

 The key to the marbleized look of this chocolate–peanut butter tart: a wooden skewer, which is used to swirl warm peanut butter atop chocolate ganache.


INGREDIENTS


FOR THE CRUST

  • 1 cup all-purpose flour, plus more for rolling
  • 1/4 teaspoon salt
  • 1/3 cup unsweetened cocoa powder (preferably Valrhona)
  • 1 stick unsalted butter, softened
  • 1/4 cup sugar
  • 1 large egg
  • 1 teaspoon pure vanilla extract
  • 2 tablespoons heavy cream

FOR THE BRITTLE

  • 1/2 cup sugar
  • 2 tablespoons unsalted butter
  • 1 tablespoon light corn syrup
  • 2 tablespoons water
  • 1/4 teaspoon baking soda
  • 3/4 teaspoon salt
  • 6 ounces (1 1/2 cups) cocktail peanuts, finely chopped in a food processor

FOR THE FILLING

  • 3/4 cup smooth peanut butter
  • 3/4 cup heavy cream
  • 5 ounces semisweet chocolate (61 percent), chopped
  • Pinch of salt

DIRECTIONS


  1. Make the crust: Whisk flour, salt, and cocoa powder. Beat butter and sugar with a mixer on medium-high speed until pale and fluffy, about 3 minutes. Add egg and vanilla, and beat until combined, scraping down sides of bowl. Reduce speed to low, and gradually beat in flour mixture in 3 batches, alternating with cream and beginning and ending with flour mixture. Shape dough into a rectangle, wrap in plastic wrap, and refrigerate until firm, at least 1 hour and up to 2 days. Let stand at room temperature 5 minutes before rolling.
  2. Roll out dough into a 7-by-16-inch rectangle on a floured surface. Fit into a 4 1/2-by-14-inch rectangular tart ring on a parchment-lined baking sheet. Push dough into corners of ring to create sharp edges; trim so that dough is flush with top of ring. Prick dough all over with a fork. Freeze until firm, about 30 minutes.
  3. Preheat oven to 350 degrees. Line crust with parchment, pressing so that it is flush with dough, especially in corners. Fill with pie weights or dried beans; bake until edges are set, about 20 minutes. Remove weights and parchment; bake until cooked through, about 10 minutes. Let cool completely, about 30 minutes.
  4. Make the brittle: Bring sugar, butter, corn syrup, and water to a boil in a small saucepan over high heat. Cook, stirring occasionally, until mixture begins to brown. Reduce heat to medium, and cook until golden brown. Stir in baking soda,salt, and peanuts until well combined (mixture should be the color of peanut butter). Immediately pour onto a nonstick baking mat, spreading out as thinly as possible with a heatproof spatula or wooden spoon. Let cool completely, about 30 minutes. Finely chop half the brittle with a heavyknife to yield 1/2 cup. Reserve remainder for another use.
  5. Make the filling: Heat peanut butter in a microwave until fluid, about 30 seconds. Pour 1/2 cup into crust, and top with chopped brittle, pressing it into peanut butter. Freeze tart until peanut butter is firm, about 10 minutes. For ganache, bring cream to a boil; pour over chocolate in a small bowl. Add salt; let sit 8 minutes.
  6. Meanwhile, fill a disposable pastry bag with remaining fluidpeanut butter (if peanut butter has thickened, microwave it 10 seconds), and snip off end. Whisk ganache until smooth, and immediately pour into tart, smoothing with a mini offset spatula if necessary. Pipe peanut butter in continuous diagonal zigzag lines down length of tart. Draw a wooden skewer perpendicularly through peanut butter lines in a zigzag motion down length of tart. Then draw skewer in a continuous sideways loop pattern down length of tart to create swirls.
  7. Refrigerate tart until set, at least 1 hour and up to 8 hours. Cut into wedges, and serve. 
Steph


Thursday, 8 October 2015

Creepy Cookie Cake

Creepy Cookie Cake

With Halloween around the corner, we want you to be prepared with one of the best recipes for the occasion. This recipe is quick, easy and tasty! I made it for Halloween a few years ago and it caught on with my friends and now they ask me to make it for every holiday!This recipe is quick, easy and tasty! I made it for Halloween a few years ago and it caught on with my friends and now they ask me to make it for every holiday!


What you need:


• 1 (8-ounce) package cream cheese, softened to room temperature

• 1/2 cup sugar
• 1 cup sour cream
• 1 teaspoon vanilla extract
• 1 (8-ounce) container whipped topping (recommended: Cool Whip)
• 1 1/2 cups crushed chocolate sandwich cookies plus 10 whole cookies (recommended: Oreo)
• 1 (9-inch) chocolate pie crust


What to do:

1. Combine softened cream cheese and sugar in mixing bowl.
2. Beat with an electric mixer on low speed until creamy.
3. Add sour cream and vanilla, beat until well combined.
4. Stir in cool whip and crushed cookies.
5. Spoon mixture into pie crust using a rubber spatula to spread evenly.
6. Refrigerate for 4 to 5 hours before serving.
7. Through a fine sifter, heavily sprinkle cocoa powder over the cake to make it look like dirt in a graveyard.
8. To make tombstone cookies scrape the cream filling out of chocolate cookies. Cut off ends of cookies so as to make a rectangular shape.
9. Using royal icing in a piping bag, pipe spooky decorations and words on the tombstone cookies. Examples: BOO, RIP.

By Hovig

Thursday, 17 September 2015

Heaven in a Cup


3-Ingredient Fruit & Yogurt SmoothieSpring is here and now it’s time for us to focus on whats around the corner Summer! Meaning cheat days are kinda limited in September , because our summer bodies will be revealed very soon, everyone will be hitting the gym and little time to bake up a dessert feast so for this month our recipe will be quick, easy and healthy. NO recipe needed – it’s all below with great detail- enjoy the making of eye closing delicious smoothness of spring in a cup …, The good old 3 ingredient fruit & yogurt smoothie … just use Silk Unsweetened Cashew milk, Silk Strawberry Dairy-Free Yogurt, and a frozen mixed berry blend of strawberries, blueberries, raspberries, and blackberries. just  bake and make a  cold smoothies with Silk products because they’re so low in calories and fat, they’re vegan and dairy-free, and I always get impressive-tasting results.

-Mary Luluga 

Thursday, 13 August 2015

Peach-and-Toasted Pecan Ice Cream

August is National Peach Month! Believe it or not, peaches are part of the rose family! And while Georgia may be known as the Peach State, the most peaches are actually grown in California (producing about half of the US crop).
Peaches are not only juicy and tasty but they are packed with nutrition! One large peach has only 68 calories but provides 19% of an adult’s daily value for vitamin C, 11% for vitamin A and 10% or potassium. It contains close to 3 grams of dietary fiber which is approx. 10% of your daily dietary fiber recommendation.

What a great and enjoyable snack!!!

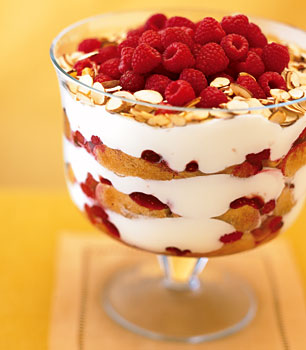
Now have I got a treat for you - homemade ice cream that’s basically a cross between peach ice cream and butter pecan.

Salty-sweet ice cream, serve in a dish or on waffle cones, as shown.


Ingredients

Print Recipe
Email
Save Recipe
Add to Shopping List
3/4 cup sugar
2 tablespoons cornstarch
1/8 teaspoon table salt
2 cups milk
1 cup heavy whipping cream

1 egg yolk
1 1/2 teaspoons vanilla bean paste*
1 cup peeled and coarsely chopped peaches
2 tablespoons light corn syrup
1 1/2 tablespoons butter
1 cup coarsely chopped pecans
1/4 teaspoon kosher salt

Preparation

1. Whisk together first 3 ingredients in a large heavy saucepan. Gradually whisk in milk and whipping cream. Cook over medium heat, stirring constantly, 10 to 12 minutes or until mixture thickens slightly. Remove from heat.

2. Whisk egg yolk until slightly thickened. Gradually whisk about 1 cup hot cream mixture into yolk. Add yolk mixture to remaining cream mixture, whisking constantly. Whisk in vanilla bean paste. Cool 1 hour, stirring occasionally.

3. Meanwhile, cook peaches and corn syrup in a small saucepan over medium heat, stirring often, 4 to 
5 minutes. Coarsely mash, and let cool 30 minutes. Stir peach mixture into cooled cream mixture.

4. Place plastic wrap directly on cream mixture, and chill 8 to 24 hours.

5. Meanwhile, melt butter in a small skillet over medium heat; add pecans, and cook, stirring constantly, 8 to 9 minutes or until toasted and fragrant. Remove from heat, and sprinkle with 1/4 tsp. kosher salt. Cool completely (about 30 minutes).

6. Pour chilled cream mixture into freezer container of a 1 1/2-qt. electric ice-cream maker, and freeze according to manufacturer's instructions. (Instructions and time may vary.) Before transferring ice cream to an airtight container for further freezing, stir in pecan mixture.
*Vanilla extract may be substituted.

Stephanie 

Friday, 17 July 2015

Granny Smith Apple Pie 

Granny Smith Apple Pie 

July is the 7th month of the year, which calls for a warm pie to treat your taste buds. Granny Smith is iconic for its luscious green juicy apples, perfect for this months dessert. Granny Smith apples have been chosen to give the best possible flavour for the pie. Perfect warm dessert for this winters coldest nights.


Ingredients:

  • 300 g (2 cups) plain flour
  • 2 tbsp caster sugar
  • 100 g cold unsalted butter, cut into cubes
  • 1 egg, beaten with 2 tsp water
  • 8 granny smith apples, peeled, cored and thickly sliced
  • 165 g (¾ cup) caster sugar
  • 50 g (¼ cup) plain flour
  • ½ tsp ground nutmeg
  • 1 tsp ground cinnamon
  • 1 tsp vanilla extract
  • 48 g unsalted butter, chopped, at room temperature


Method:

1. To make pastry, using a food processor, process flour, sugar, butter and ½ tsp salt until mixture resembles fine breadcrumbs. 

2. Add 60ml ice-cold water and process until mixture forms a ball. Shape two-thirds of dough into a disc and cover with plastic wrap. Repeat with remaining one-third dough.

3. Refrigerate both discs for 30 minutes, to rest.Preheat oven to 200°C. 

4. Using a lightly floured rolling pin, roll out larger disc between two sheets of baking paper to a 30cm round. Line a greased deep 26cm pie dish with pastry. Roll out remaining pastry disc to a 26cm round, and refrigerate until needed.

5. To make filling, combine all ingredients except beaten egg mixture in a large bowl. 

6. Place in pastry case, brush edges of pastry with egg wash, top with remaining pastry round then seal by pressing edges together using your thumb and index finger. 

7. Using a small sharp knife, make 3 small incisions in pastry top to allow steam to escape, then brush top with beaten egg mixture. 

8. Bake for 50 minutes or until golden and juices begin to bubble through incisions in crust.

9. Serve while still warm and soft.


By Hovig


Saturday, 13 June 2015

The Royal dessert

it’s the long weekend month! And that’s all thanks to the almighty queen herself, she celebrates her birthday on the second Monday of this month so we shall be dedicating this month’s dessert to the royal family- this month’s recipe serves up to 12 people so you can feast just like the royal family would on Queen Elizabeth’s born day… why not try the one and only “ENGLISH TRIFLE”, this dessert is a cold dessert made with sponge cake spread with jam or fruit, soaked in wine or sherry sauce , covered with a custard sauce and cream, and decorated. 


Ingredients
·       1 package (.3 ounce) sugar-free strawberry gelatin
·       1 cup boiling water
·       1 cup cold water
·       1 cup mashed strawberries
·       1 teaspoon sugar
·       1 can (8 ounces) unsweetened pineapple chunks
·       1 cup sliced firm bananas
·       1 prepared angel food cake (8 to 10 ounces), cut into 1-inch cubes
·       2 cups sliced fresh strawberries
·       2 cups cold fat-free milk
·       1 package (1 ounce) sugar-free instant vanilla pudding mix
·       1 carton (8 ounces) frozen fat-free whipped topping, thawed
·       1/4 cup slivered almonds, toasted
1. In a small bowl, dissolve gelatin powder in boiling water. Stir in cold water. Transfer half of the gelatin mixture to a small bowl; cover and refrigerate for 1 hour or until slightly thickened. Reserve remaining gelatin mixture; let stand at room temperature.
2. In a small bowl, combine mashed strawberries and sugar; set aside. Drain pineapple, reserving 1/4 cup juice; cut pineapple chunks in half and set aside. Toss banana slices with reserved pineapple juice; set aside.
3. In a 3-qt. trifle bowl, layer half of each of the following: cake cubes, mashed strawberries, pineapple, banana mixture and sliced strawberries. Pour refrigerated gelatin over top. Set aside remaining cake and fruit. Place trifle and reserved gelatin in refrigerator for 20 minutes or until gelatin is slightly thickened.

4. In a small bowl, whisk milk and pudding mix for 2 minutes. Let stand for 2 minutes or until soft-set. Spread half over trifle. Repeat layers with remaining cake, fruit, reserved gelatin and pudding. Top with whipped topping. Cover and refrigerate. Just before serving, sprinkle with almonds. Yield: 12 servings.

By Mary Luluga 

Friday, 8 May 2015

MOTHER'S DAY SPRITZ COOKIES

 To All The Beautiful Mothers Out There.
Thank You For All You Do!

One relationship which is always with us is the one we share with our mothers. They are our guiding force and are responsible for making us who we are. Mothers also shape our lives and our personalities and crediting them for the same is something one should do at every opportunity. We might have our own individualistic approach in paying tribute to these amazing people in our lives, our mothers.


So to satisfy Mum's sweet tooth this Mother’s day why use your cookie press only at Christmas? The Cookie Pro ULTRA II Cookie Press includes disc shapes that are perfect for pressing Mother's Day cookies. Decorate them with Candy Melts candy and decorative sugars or nonpareils for a treat she'll treasure.


INGREDIENTS

WILTON COLOR RIGHT PERFORMANCE COLOR SYSTEM
$24.99 or Pink food colouring

WHITE NONPAREILS
$2.29 or Small white ball shape sprinkles

12 ounces White Candy Melts® Candy


Instructions

Step 1
Cookie Dough Colors Tinted

Use Color Right base colors and QuickCount color formula to tint cookie dough in the following shade:
--Pink: 1/2 spritz dough recipe + 3 P
--Yellow: 1/2 spritz dough recipe + 3 Y

OR a drop or two of pink food colouring

Step 2
Make cookies. Prepare dough and tint as directed above. Use cookie press to press cookies on cookie sheet. Bake and cool cookies.

Step 3
Decorate flower cookies. Use melted white Candy Melts candy in a cut parchment bag to outline petals. Chill until firm, about 3 to 5 minutes. Pipe dot center and sprinkle with white nonpareils. Chill until firm, about 3 to 5 minutes.

Step 4
Decorate ornament cookies. Use melted white Candy Melts candy in a cut parchment bag to drizzle cookies. Chill until firm, about 3 to 5 minutes.

Steph

Thursday, 16 April 2015

Chocolate Hot Cross Buns

Chocolate Hot Cross Buns

We have reached the month of April and the month of Easter, what better way to celebrate than with the traditional hot cross bun. Chocolate hot cross buns are best served warm for the full mouth watering experience.

Ingredients:


  • 600g plain flour
  • 2 tsp dry yeast
  • 60g brown sugar
  • 2 tsp cinnamon
  • 1 tsp mixed spice
  • 1/4 cup cocoa
  • 2 tsp salt
  • 2 eggs
  • 250ml milk, lukewarm
  • 2 tbsp orange marmalade, chopped
  • 40g unsalted butter, softened
  • ½ cup currants
  • ½ cup small chocolate chips or chopped chocolate buttons
  • 1 tbsp mixed peel, optional
  • Crosses Plain flour
  • Water
  • Glaze ½ cup caster sugar
  • ½ cup water


Method:


  1. Mix together the flour, yeast, sugar, cinnamon, mixed spice, cocoa and salt.
  2. In a separate bowl, add milk, eggs and marmalade.
  3. Slowly add the dry mixture to the wet or, if using a stand mixer with a dough-hook, wet mixture to the dry.
  4. When mixed through, knead in the softened butter, then the choc-chips and currants/mixed peel. Knead for 5 more minutes.
  5. Spray a large bowl with canola oil, put dough in, and cover with cling film. Allow to prove until it doubles in size (mine took about 1 hour).
  6. Re-knead for 3 minutes and then divide into 15 rolls, place them on a greased baking tray about 2cm apart, re-cover with cling wrap and leave to prove a second time until they double in size.
  7. Preheat oven to 190°C.
  8. Put the crosses on the buns by mixing some flour and water in a zip lock bag until it makes a runny-ish paste. Cut the corner off the zip lock bag and pipe on the crosses.
  9. Bake in oven for 10-15 minutes until they start to brown on top.
  10. Whilst hot, make the glaze by boiling the ingredients together until the sugar has dissolved. Brush on with a pastry brush.

    By Hovig


Thursday, 19 March 2015

St Patrick's Shamrock Cookies

MARCH: We are one quarter into the year and I ask all of our readers to put on your leprechaun hats to celebrate the All green St Patrick's Day that falls on March 17, so this month’s dessert will be dedicated to the love of desserts and celebrating the traditional and religious event that marks the day of Saint Patrick's Death known as the apostle of Ireland, observed by the catholic church in the early 17th century. In accordance to what the history of St Patrick’s is all about. Let’s talk about how we are going to fill our tummies for this joyous celebration. This month’s desserts are a quick and easy recipe:

 “ST PATRICKS SHAMROCK COOKIES” – we all know what cookies taste like, but just in case you don’t- Cookies have a unique irresistible taste. Cookies are creamy, and ooze with a delicious buttery taste; the crunchy, golden texture compliments the smooth, yet sweet chocolate chips (if added), and almost melts in your mouth… Cookies… Heaven.


Recipe
INGREDIENTS
·        14 cup packed brown sugar
·        14 teaspoon vanilla extract
·        1 cup flour
·        14 teaspoon salt
·        12 cup butter or 12 cup margarine, softened
·        Check Out Our Top Rolled Recipe
DIRECTIONS
-          Preheat oven to 325°F
-          In a medium bowl, beat butter or margarine and brown sugar with an electric mixer on medium speed until light and fluffy.
-          Stir in vanilla.
-          Add flour and salt to the butter and blend well.
-          With a rolling pin on a lightly floured surface, roll out dough 1/4-inch thick.
-          Cut out cookies using a 3 inch Shamrock cookie cutter and place 2 inches apart on ungreased cookie sheets.
-          Re-roll scraps.
-          Sprinkle green sugar crystals on each cookie.
-          Bake 20 to 25 minutes, until cookies are pale golden, not brown.
-          Let stand 2 minutes.
-          Remove to a rack and let cool completely.

By Mary Luluga